Para la planificación temprana, es mejor fijar las dimensiones del banco de sauna a partir de la techo acabado, postura prevista y longitud útil de banco que de un único número universal de suelo a asiento. Harvia recomienda actualmente alrededor de 1100–1200 mm (43–47 in) desde el banco superior hasta el techo, aproximadamente 500 mm (20 in) de profundidad del banco superior para sentarse, 600 mm (24 in) o más para reclinarse o sentarse con los pies en alto, aproximadamente 600 mm (24 in) de ancho de banco por usuario sentado, y alrededor de altura del escalón de 350 mm (14 in).
Esos valores son referencias de planificación del fabricante, no códigos universales de sauna. La geometría final de los bancos todavía tiene que funcionar con la sala real, la relación entre nivel superior/inferior, las distancias de seguridad del calentador y la protección, la trayectoria de la puerta, el acceso, los usuarios previstos y cualquier requisito de accesibilidad específico del proyecto. Cuando un calentador o sistema de bancos seleccionado proporciona requisitos específicos del modelo, esos tienen prioridad sobre las cifras genéricas de planificación.
Si todavía está comparando formatos y modelos reales de sauna en lugar de revisar una distribución de bancos terminada, comience con la gama de saunas HACHILL.
¿Qué dimensiones de los bancos de sauna deben comprobarse realmente?
Un banco de sauna no puede evaluarse solo por su altura. Como mínimo, el plano debe dejar claro el elevación del banco, profundidad útil, longitud útil sin interrupciones, relación entre niveles superior e inferior, techo acabado, escalones o plataforma para los pies, zona del calentador y su protección, recorrido de la puerta y espacio de circulación.
La distinción entre dimensiones nominales y útiles es importante. Una pared larga no garantiza necesariamente la misma longitud de asiento útil: el calentador, la protección, la puerta, la transición en las esquinas o la vía de acceso pueden reducirla. Un banco superior profundo también puede perder valor si el techo acabado deja poca altura libre.
En pantallas más pequeñas, deslice o desplácese horizontalmente para ver la tabla completa.
| Entrada de dibujo | Qué indica realmente |
|---|---|
| Altura del techo acabado | Espacio vertical disponible sobre el banco ocupado |
| Elevación del banco superior | Dónde se sienta el usuario dentro del entorno térmico vertical de la sala |
| Banco inferior / escalón | Acceso al nivel superior y posición de la parte inferior del cuerpo |
| Profundidad útil del banco | Si la superficie soporta la postura prevista de sentado o reclinado |
| Longitud útil sin interrupciones | Espacio real ocupado para sentarse o reclinarse |
| Zona del calentador y protección | Qué área aparente del banco no puede contarse como útil |
| Puerta y vía de circulación | Si la entrada entra en conflicto con las posiciones ocupadas |
| Proyección del respaldo / reposapiés | Si los accesorios reducen el espacio útil del banco |
Los sistemas de banco actuales del fabricante usan diferentes profundidades y longitudes configurables. Por ejemplo, el sistema de banco Harvia’s Formula ofrece actualmente Opciones de profundidad de asiento de 400, 500 y 600 mm con longitud de asiento personalizable. Es una prueba útil de que la geometría de los bancos de sauna no es una única dimensión fija de la industria. Consulte los datos del producto del sistema de bancos Formula de Harvia.
En la práctica, defina la geometría completa ocupada antes de decidir si una disposición de bancos es adecuada.
¿Cómo debería relacionarse la altura del banco de sauna con el techo y la zona de calor?
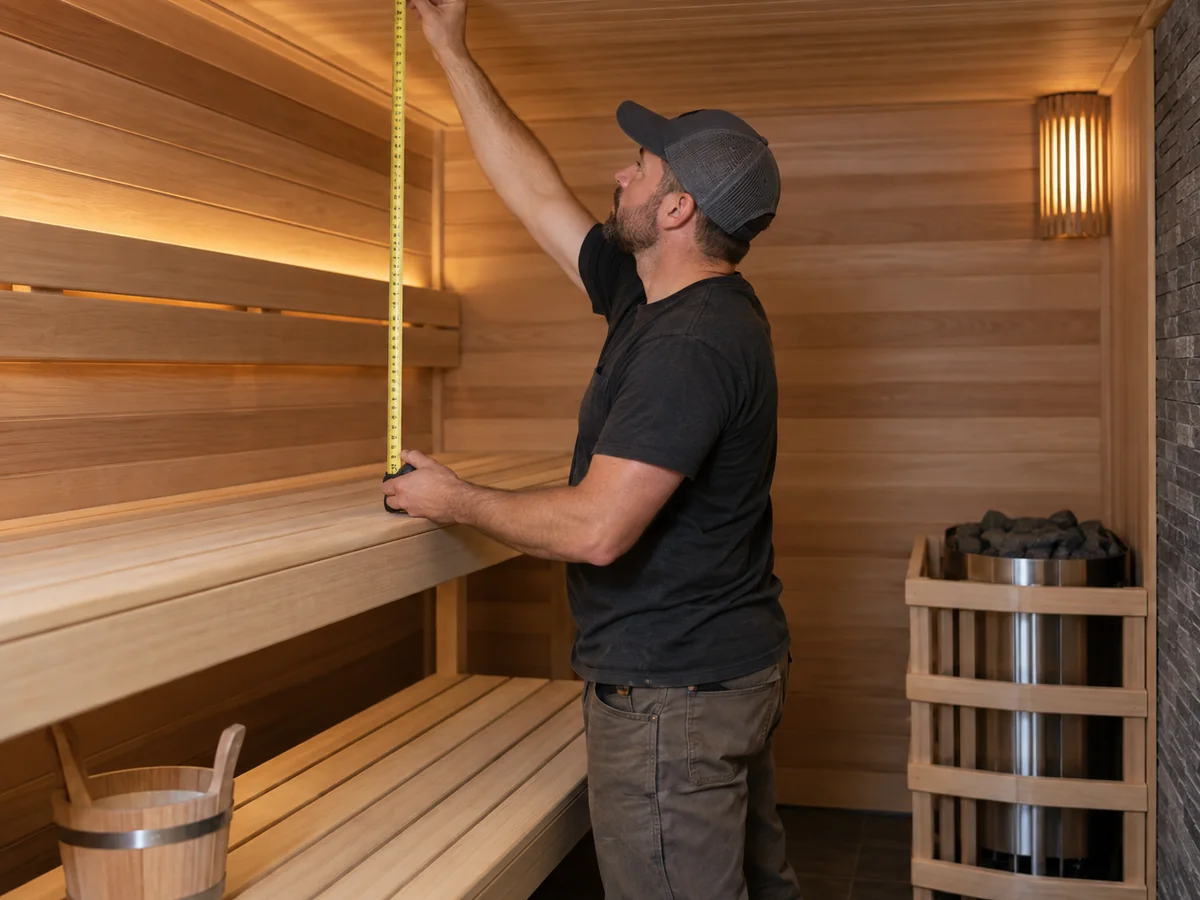
La altura del banco de sauna debe evaluarse en relación con el techo terminado y la zona de calor ocupada, no solo como una medida de suelo a asiento.
La estratificación térmica significa que las condiciones del aire pueden diferir verticalmente dentro de la sala. Un artículo de investigación finlandés de 2026 sobre saunas midió la temperatura y la humedad relativa en dos alturas (0.90 m y 1.73 m) y tres posiciones horizontales y reportó condiciones materialmente diferentes en las dos alturas medidas bajo las condiciones de prueba. Eso respalda una interpretación consciente de la posición en lugar de suponer que una temperatura ambiente representa todos los niveles ocupados. Revise el estudio de medición multipunto de sauna de 2026.
La distribución real también se ve afectada por la sala, el calentador y el flujo de aire, por lo que esto no no crea una regla universal como “el banco superior siempre está X grados más caliente”.”
Banco superior: altura libre y zona de calor ocupada
El banco superior debe resolver dos cosas a la vez: situar al usuario en una parte útil de la sala calefactada y dejar una altura libre práctica bajo el techo acabado. Elevar el banco sin comprobar el techo puede hacer que la posición de asiento quede estrecha. Colocarlo innecesariamente bajo puede dejar más volumen de la sala más caliente por encima del usuario en lugar de alrededor de la zona ocupada.
La guía actual de planificación de bancos de Harvia recomienda aproximadamente 1100–1200 mm (43–47 in) entre su banco superior y el techo. Trátelo como una referencia de planificación de un fabricante concreto, no como un código global ni una dimensión que se aplique automáticamente a todas las saunas. Guía de planificación de bancos de Harvia.
Por eso, una dimensión de suelo a asiento debe tratarse como un resultado de la geometría de la sala, en lugar del primer número copiado en el plano.
Un usuario sentado, alguien sentado con los pies en el mismo banco y alguien recostado no ocupan la misma envolvente vertical. Para una coordinación más amplia de toda la sala, incluidos los interfaces de recinto y ventilación, utilice los de HACHILL’s Cómo construir una sauna guía en lugar de convertir esta página en un manual de construcción.
Nivel de banco inferior y escalón: acceso, apoyo de pies y posición vertical
El nivel inferior puede funcionar como asiento, apoyo para los pies, escalón de acceso o una combinación de esas funciones. Esas funciones no deben reducirse a una única altura universal de banco inferior.
Su relación con el banco superior modifica la facilidad de acceso, la posición de los pies y la parte inferior del cuerpo, el espacio útil para las piernas, la circulación cerca del calentador y la posición del usuario dentro del entorno térmico vertical de la cabina. Por lo tanto, el plano debe mostrar los niveles de forma independiente en lugar de limitarse a especificar “bancos de dos niveles”.”
La guía actual de planificación de bancos de Harvia utiliza aproximadamente 350 mm (14 in) para la altura del escalón como recomendación de planificación del fabricante. Trate esa cifra como una referencia específica de la fuente, no como un requisito universal de sauna, escalera o accesibilidad. Guía de planificación de bancos de Harvia.
¿Qué profundidad y longitud debe tener un banco de sauna para sentarse, reclinarse y una capacidad real?
La profundidad del banco debe seguir la postura; la longitud del banco debe juzgarse por las posiciones ocupadas utilizables. Ninguna de las dos debe aprobarse a partir de una regla universal de dimensiones o de número de personas.
Profundidad para sentarse vs. reclinarse
Una superficie utilizada principalmente para estar sentado erguido no tiene el mismo requisito de profundidad que una destinada a sentarse con los pies en alto o a tumbarse.
La guía actual de planificación de Harvia utiliza aproximadamente 500 mm (20 in) como referencia para la profundidad del banco superior y recomienda 600 mm (24 in) o más cuando se pretenda recostarse o sentarse con los pies sobre el banco. Estas son recomendaciones útiles del fabricante, no dimensiones mínimas universales.
- Defina la postura prevista.
- Determine la profundidad necesaria para esa postura.
- Compruebe cómo afecta esa profundidad a la circulación y a la geometría del nivel inferior.
- Confirme que la sala final sigue siendo funcional.
Un banco más profundo puede admitir más posturas, pero también consume anchura de la sala. Más profundidad no es automáticamente mejor.
Longitud útil frente a capacidad de personas comercializada
La longitud del banco crea un problema diferente: los compradores a menudo tratan el número de personas del modelo como prueba de que la disposición física de los asientos será cómoda. No lo es.
Para la capacidad, utilice la cadena de decisión completa: capacidad comercializada → disposición real de bancos → exclusiones de calentador/puerta → posiciones ocupadas utilizables → postura prevista → ajuste realista.
Harvia utiliza actualmente aproximadamente 600 mm (24 in) por usuario sentado como regla general en sus directrices generales de diseño. Esto es útil para una evaluación preliminar, pero no debe convertirse en una ecuación universal de capacidad. Consulte las directrices generales de diseño de sauna de Harvia.
La capacidad real utilizable cambia cuando el calentador o la protección eliminan parte del recorrido, la puerta interrumpe el banco, los usuarios desean reclinarse, las esquinas reducen la postura utilizable o la profundidad es inadecuada para el uso previsto.
Capacidad de catálogo ≠ capacidad de banco utilizable ≠ capacidad cómoda ≠ rendimiento comercial.
Si la decisión se refiere al rendimiento del local, la rotación de limpieza o la capacidad operativa en lugar del ajuste físico del banco, asigne esa tarea a la Solución de sauna comercial HACHILL.
Bancos rectos, en L o enfrentados: ¿qué distribución aprovecha mejor el espacio?
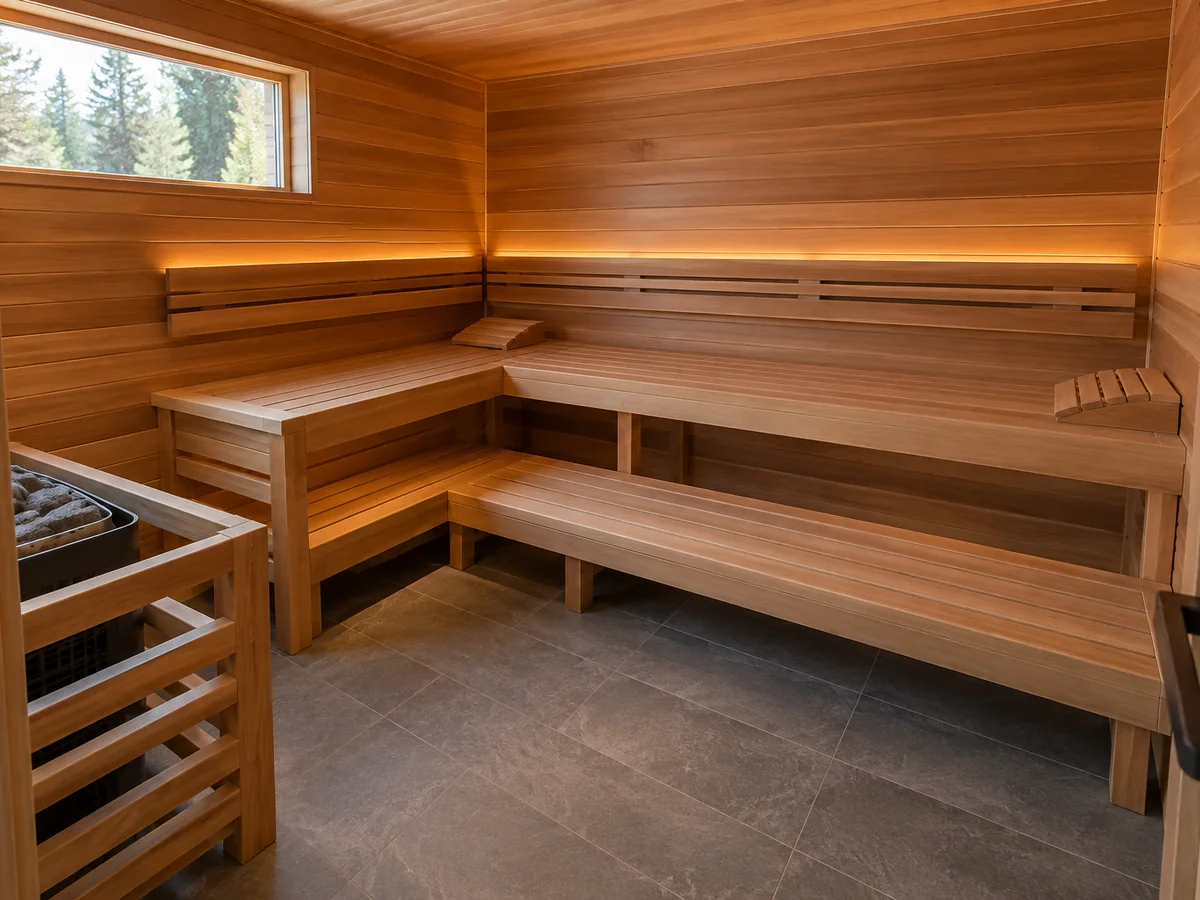
No existe una distribución de bancos de sauna universalmente mejor. La mejor distribución es la que deja el mayor espacio útil ocupado después de incluir el calentador, la puerta y la ruta de circulación.
En pantallas más pequeñas, deslice o desplácese horizontalmente para ver la comparación completa.
| Distribución | A menudo útil cuando | Principal contrapartida |
|---|---|---|
| Recto | El espacio es compacto y la longitud de banco sin interrupciones es importante | Menos orientaciones de asiento |
| En forma de L | Una esquina puede crear otra dirección de asiento o un tramo útil para reclinarse | La geometría de esquina puede consumir espacio de circulación |
| Opuestas | La sala es lo bastante ancha para asientos enfrentados | El espacio para las piernas, la posición del calentador y la circulación central se vuelven más exigentes |
En una sala pequeña, una distribución recta simple puede conservar más asientos útiles que forzar una disposición en esquina o en U en la misma superficie. Un banco en L puede funcionar bien cuando la sala realmente lo admite, pero no debe elegirse solo porque parece más premium en un plano.
Los bancos enfrentados necesitan espacio suficiente para las piernas de los usuarios, la circulación y la disposición del calentador. La orientación de bancos de HARVIA también señala que la ubicación del calentador puede consumir parte del espacio central entre bancos enfrentados.
La comparación útil es cuánta geometría de banco utilizable e ininterrumpida queda después de dibujar el equipo y el acceso.
¿Qué restricciones de seguridad y accesibilidad pueden anular una distribución cómoda de los bancos?
Un banco cómodo no es automáticamente un banco aceptable. Tres niveles diferentes de aprobación pueden afectar al mismo plano: confort y ergonomía, seguridad del calentador y de las superficies calientes, y accesibilidad u otros requisitos del proyecto cuando correspondan.
Distancias de seguridad para calentador y protección
El margen de seguridad del calentador seleccionado tiene prioridad sobre los asientos adicionales. La guía técnica actual de HARVIA indica que los calentadores tienen distancias de seguridad específicas del modelo que rigen qué tan cerca pueden estar de paredes y bancos combustibles, y que esos valores provienen de la placa de características, las instrucciones o la información de producto del calentador exacto. Guía de distancias de seguridad para calentadores Harvia.
Si el modelo de calentador cambia después de preparar el plano del banco, vuelva a abrir la revisión de espacios libres. Para preguntas de selección de equipos, utilice HACHILL’s Guía de compra de calentadores de sauna.
Acceso, escalones y riesgo de caída
La ruta hacia el banco importa tanto como el banco en sí. Debe comprobarse si en la disposición los usuarios pueden alcanzar el nivel previsto sin ser dirigidos de forma incómoda hacia el calentador o la protección.
- ¿Pueden los usuarios acceder al nivel superior sin conflicto con el calentador?
- ¿La puerta interfiere con la ruta?
- ¿La profundidad adicional del banco comprime la circulación?
- ¿El nivel inferior realmente ayuda al acceso, o solo se ve simétrico?
Los requisitos exactos del calentador y de la protección aún corresponden a las instrucciones del equipo seleccionado.
Accesibilidad donde corresponda
La accesibilidad es un requisito del proyecto distinto de la ergonomía residencial ordinaria. Según las U.S. 2010 ADA Standards, La Sección 241 abarca saunas y salas de vapor, y la Sección 612 requiere un espacio de giro accesible; cuando se proporcionan asientos, al menos un banco debe cumplir con la Sección 903, y la puerta no puede abrir hacia el espacio libre requerido de ese banco.. Aplique esas disposiciones solo cuando el alcance de la ADA de EE. UU. sea relevante para el proyecto. Revise las Normas ADA de EE. UU. de 2010.
Guía de confort residencial ≠ cumplimiento de ADA para banco accesible.
No tome una dimensión de banco accesible de un contexto regulado de EE. UU. y la publique como la altura o profundidad normal para toda sauna residencial.
¿Qué detalles del banco facilitan la limpieza, el secado y el mantenimiento?
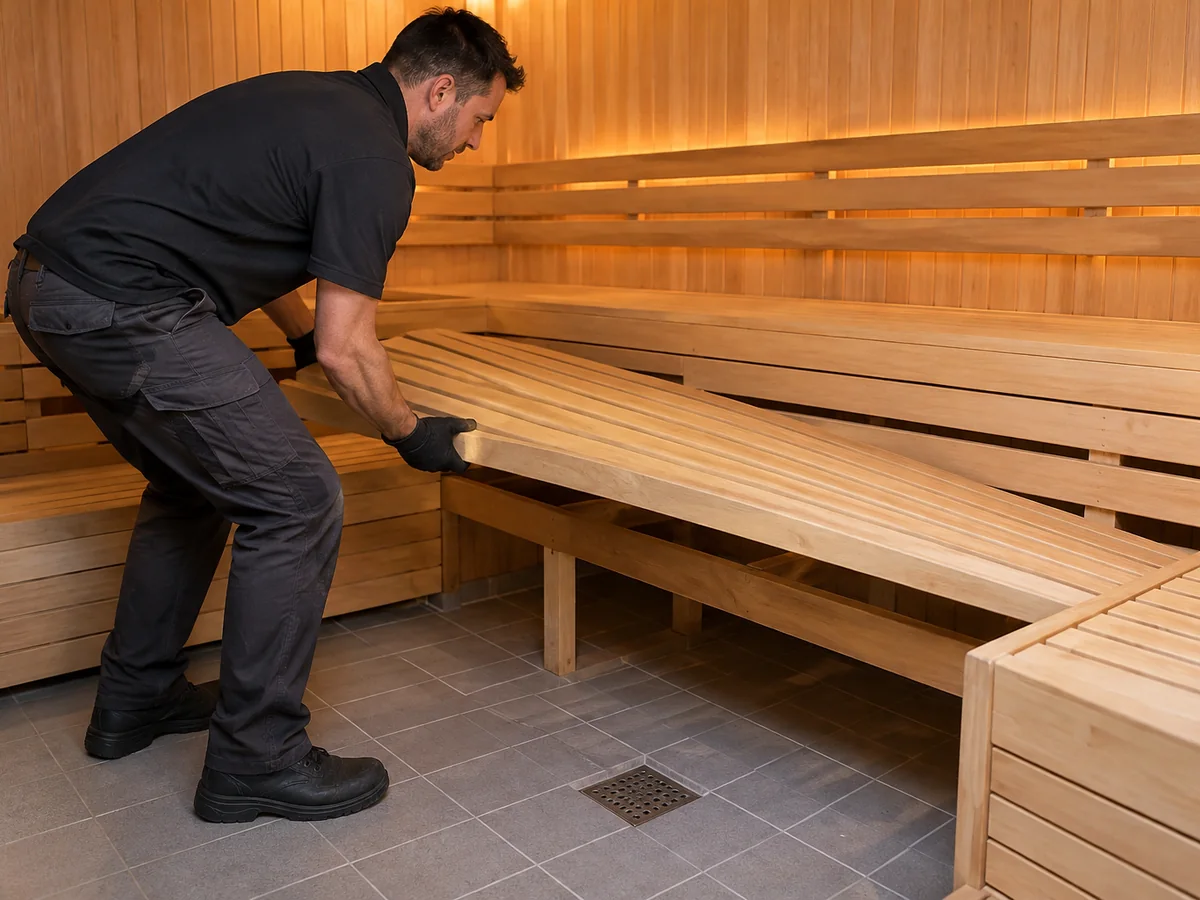
La disposición de los bancos también controla si la sala se puede limpiar, secar e inspeccionar después de la instalación.
La guía actual de Harvia’s sobre mantenimiento de saunas también hace hincapié en permitir que las partes de madera de la sauna tengan tiempo suficiente para secarse después del uso. Guía de mantenimiento de saunas Harvia.
- ¿Se puede acceder al suelo debajo del banco?
- ¿Pueden secarse las superficies de madera después del uso?
- Si el sistema de bancos seleccionado incluye secciones desmontables, ¿realmente se pueden retirar sin desmontar otros componentes?
- ¿Sigue siendo posible acceder al calentador y a las zonas de servicio cercanas?
- ¿Los respaldos, reposapiés o niveles inferiores crean zonas ocultas difíciles de inspeccionar?
Algunos sistemas de banco actuales utilizan deliberadamente secciones de banco desmontables para mejorar el acceso de limpieza. El sistema Solar de Harvia’s es un ejemplo. Consulte Harvia’s sistema de banco Solar.
Eso hace no significa que todos los bancos de sauna deban ser desmontables. Significa que la facilidad de limpieza pertenece a la revisión de geometría antes de aprobar la distribución. Tampoco hay base aquí para inventar un valor universal de separación entre tablas que supuestamente garantice mejor secado o higiene.
¿Qué debe confirmar en el plano antes de aprobar la distribución de los bancos de sauna?
No apruebe un banco de sauna a partir de un render, una etiqueta de número de personas o una dimensión aislada. El plano controlado debería permitir revisar la geometría ocupada completa.
En pantallas más pequeñas, deslice o desplácese horizontalmente para ver la tabla de decisión completa.
| Campo de dibujo | Pregunta PASS | Disparador de HOLD |
|---|---|---|
| Techo acabado | ¿Está despejada la altura útil? | La relación con el techo falta o es provisional |
| Banco superior | ¿Están dimensionadas la elevación y la profundidad útil? | Solo se muestra un símbolo de banco genérico |
| Banco inferior / escalón | ¿Está clara la relación de acceso? | El acceso al nivel superior sigue sin definirse |
| Prueba en banco | ¿Es visible la longitud útil ininterrumpida? | La capacidad solo se justifica por el número de personas |
| Calentador / protector | ¿Están resueltos el calentador seleccionado y la envolvente de seguridad? | El calentador está por definir o no se puede verificar la holgura |
| Puerta | ¿La trayectoria de la puerta se mantiene libre del espacio ocupado/de acceso? | La apertura de la puerta entra en conflicto con los asientos o la circulación |
| Respaldo / reposapiés | ¿Se incluye su proyección? | Los accesorios reducen el espacio, pero se omiten del dibujo |
| Accesibilidad | ¿Están resueltos los requisitos aplicables? | El alcance aplicable se ha excluido mediante supuestos |
| Limpieza / servicio | ¿Se puede acceder a las áreas relevantes del piso y del equipo? | Áreas principales quedan inaccesibles después de la instalación |
PROCEED y HOLD en esta guía son decisiones de verificación del comprador/proyecto, no clasificaciones regulatorias. PROCEED significa que la geometría del banco y las interfaces están listas para la siguiente revisión del proyecto; por sí mismo no establece aprobación estructural, de construcción ni regulatoria.
Para un modelo HACHILL seleccionado que requiere coordinación de producto/sitio, use Instalación y soporte técnico.