Many people in the United States like having spa tubs at home. You can be part of the 4.6% of U.S. households that have one, as shown here:
| Statistic Description | Value |
|---|---|
| Percentage of U.S. households with hot tubs | 4.6% |
| Percentage of surveyed adults currently owning a spa | 8.1% |
Before you begin, make sure to plan well. Think about safety and follow local rules. Watch out for common problems like:
- Electrical and wiring issues, like not having proper GFCI protection
- Slipping and falling on wet floors
- Getting too hot from high water temperatures
- Getting hurt by chemicals if the water is not balanced
If you prepare carefully, you can install and enjoy spa tubs at home safely.
Spa Tubs: Getting Started
Can You Install at Home?
You can install spa tubs at home if you follow the right steps and meet important requirements. Most homes can support a spa tub, but you need to check a few things first. Your home must have a solid, level foundation. Many people use a concrete pad at least 4 inches thick. This base supports the full weight of the spa tub, water, and people using it.
You also need to follow national and local building codes. These codes require a dedicated 240-volt electrical circuit and Ground Fault Circuit Interrupter (GFCI) protection. You must keep the spa tub at least 10 feet from overhead power lines and 5 feet from any building. Electrical outlets should be GFCI-protected and placed between 6 and 20 feet from the tub. Plumbing must include proper water supply and drainage. In cold areas, you should use insulated pipes.
Tip: Always check with your local building department before starting. You may need permits and inspections at different stages.
Key Considerations
Before you begin your spa tub project, think about several key factors:
- Choose a location with good sunlight and shelter from wind. This helps keep the water warm and reduces energy costs.
- Make sure the area drains well to avoid puddles and water damage.
- Plan for privacy and safety. Use natural barriers like trees or install a fence at least 48 inches high.
- Leave enough space around the spa tub for walking and maintenance.
- Hire licensed professionals for electrical and plumbing work. This keeps your installation safe and up to code.
- Measure your space carefully. The spa tub must fit with room for access and cleaning.
- Use slip-resistant flooring and add handrails for extra safety.
- Budget for ongoing costs like water treatment and repairs.
Spa tubs can bring comfort and relaxation to your home. Careful planning and attention to these details will help you enjoy your new spa safely and for many years.
Location
Foundation Needs
Choosing the right spot for your spa tub starts with a strong foundation. You need a level, stable surface that can support the full weight of the spa tub when filled with water and people. A filled spa tub can weigh between 3,000 and 6,000 pounds. Here are some foundation options you can consider:
- Concrete slabs: These are sturdy, level, and can be made to fit your spa tub perfectly.
- Reinforced decks: A well-built wooden deck with strong joists and supports can hold up to 4,000 pounds.
- Crushed gravel: A 4-inch layer of crushed stone over a hard surface helps prevent sinking.
- Paver stones: At least 2 inches thick, set over gravel and sand, provide a solid base.
- Prefabricated spa pads: These need a cleared, level area for proper support.
Note: Always check that your chosen foundation is in good condition and level. Professional site inspection helps ensure safety and long-lasting use.
Accessibility
You want your spa tub to be easy to reach and safe to use. Make sure you have enough space to move the tub into place. Sometimes, you need at least 8 feet of clearance if you bring it in flat, or 40 inches if you tip it on its side. Watch out for stairs or uneven ground, as these can make moving the tub harder.
Plan for a flat, solid area that is big enough for the spa tub, steps, and cover storage. Most 4 to 6-person spa tubs need about a 10’x10′ space. Add handrails, non-slip surfaces, and good lighting to help prevent accidents. If you install your spa tub indoors, make sure the floor can handle the weight and that the room has good ventilation.
Privacy and Distance
Placing your spa tub in the right spot helps you relax and stay safe. You should keep the spa tub at least 5 feet from your house or other buildings. This distance allows for safe electrical setup and easy maintenance. Local rules may require even more space, so check with your city or homeowners association.
For privacy, you can use fences, gazebos, or natural barriers like trees and shrubs. Privacy screens or pergolas also work well. Choose a spot close to your home for convenience, but make sure you have enough room for these features. Good planning gives you a private, peaceful place to enjoy your spa tub.
Preparation
Permits and Codes
Check your local building codes before you start. Many cities want you to get a permit for custom or in-ground spa tubs. Some above-ground models do not need permits if they are small. You must follow plumbing and electrical safety rules. Licensed professionals should check your work to keep you safe.
Tip: Always ask your local permit office for the latest rules. Rules can be different in each city or state.
Some states want your spa tub at least 5 feet from property lines. California and Minnesota have this rule. Deeper tubs often need fences with self-latching gates. Florida wants at least one safety feature, like an alarm or safety cover. If you build a deck or gazebo, you might need another permit. The 2021 International Swimming Pool and Spa Code asks for drawings and plans when you apply for a permit.
Site Prep
Get your site ready before you install the spa tub. Follow these steps:
- Pick a spot that is private, easy to reach, and looks nice.
- Measure the path for delivery and move things like fences or gates.
- Remove grass, plants, and trash from the area.
- Make the ground flat so your spa sits even.
- Choose a strong base like concrete, pavers, gravel, or a strong deck.
- Slope the ground so water drains away from the spa.
- Make sure your deck or base can hold the spa’s weight.
- Have a licensed electrician set up the wiring. Use GFCI protection and follow all rules.
- Do not use extension cords for your spa tub.
Never put a spa tub right on dirt or grass. This can make it sink or break.
Tools and Materials
You need the right tools and materials to install your spa tub safely. Here is a helpful table:
| Category | Tools/Materials Required |
|---|---|
| Foundation | Reinforced concrete pad or deck designed to support weight |
| Electrical Wiring | 240V/60A 4-wire circuits, insulated grounding conductors, THHN/THWN wires, conduit for underground wiring |
| Safety & Compliance | Local building codes, permits, proper fencing, GFCI spa panel box, bonding considerations |
| Professional Help | Licensed electrician for correct material selection and installation |
Always hire a professional electrician for wiring. This keeps your spa tub safe and follows the rules.
Spa Tubs: Foundation Options
Picking the right foundation is a big part of installing a spa tub. A strong, flat base keeps your spa safe and stops damage or sinking. You can pick from three main choices: concrete pad, reinforced deck, or gravel base. Each one has good points and some problems. Let’s see what each one offers so you can pick what fits your home.
Concrete Pad
A concrete pad gives a flat and steady place for your spa tub. This base holds up the spa, water, and people inside. Most experts say the pad should be 6 to 8 inches thick. It should have rebar or mesh inside to make it stronger. This helps stop cracks and keeps the pad strong for a long time.
- Costs less than some other choices
- Stands up well to all kinds of weather
- Needs little care after it is built
- Can be made in many shapes and colors
Disadvantages of a concrete pad:
- You cannot move it after it is built
- May crack more in cold places
- Costs more if the ground is not flat
A concrete pad also helps water drain away. If you tilt the pad a little, water will not sit under the spa. Make sure the pad is the right size for your spa tub. It should sit on ground that drains well. This stops water from building up and causing stains or harm.
Tip: Always use strong concrete and put rebar inside. This gives your spa tub the support it needs and helps the base last longer.
Reinforced Deck
A reinforced deck is good if you want your spa tub up high or close to your house. Not every deck can hold a full spa tub, so check first. Most decks hold about 40-60 pounds per square foot. Spa tubs need decks that hold 100 pounds per square foot or more.
To make your deck strong enough, you might need to:
- Add more support posts
- Make beams and joists bigger
- Put joists closer together
- Use bigger footings
It is important to have a pro check your deck. An engineer or contractor can tell you if it is safe or needs work. A reinforced deck makes it easy to get to your spa tub. It can also look nice in your yard. But it needs careful planning and regular checks to stay safe.
Note: Decks must be flat and in good shape before you put a spa tub on them. Always follow local rules and ask a pro for help.
Gravel Base
A gravel base is another choice, especially if you want something simple. Gravel lets water drain away, so puddles do not form. This helps stop slips. Use clean ¾-inch crushed stone gravel. It locks together when packed down.
Here is a table with drainage tips for a gravel base:
| Drainage Consideration | Explanation |
|---|---|
| Gravel base allows water drainage | Water from splashes or rain goes through gravel, stopping puddles around the spa tub. |
| Use of clean ¾” crushed stone gravel | This size locks together when packed, giving strong support and letting water drain. |
| Stabilization fabric beneath gravel | Makes the base more stable and keeps gravel from moving. |
| Minimum 4 inches of crushed stone | Gives enough depth for good drainage and support like concrete pads. |
| Retaining border around gravel | Keeps gravel in place and keeps the base strong. |
| Well-drained base reduces slip hazards | Stops water from pooling and making the area slippery. |
Put a special fabric under the gravel to keep it from moving. A border around the gravel keeps it in place. Make sure the gravel is at least 4 inches deep and flat before you put your spa tub on it.
Tip: A gravel base works best where water drains well. Do not use gravel if your yard is always wet or muddy.
Why a Solid, Level Base Matters
No matter which base you pick, it must be strong, flat, and level. Spa tubs can weigh 3,000 to 6,000 pounds when full. If the base is weak, the spa can sink, crack, or tip over. Always add up the weight of the spa, water, and people to make sure your base can hold it.
A good base keeps your spa tub safe and protects your money. Take your time to plan and build the right base before you do anything else.
Electrical and Plumbing
Electrical Setup
Setting up electricity for your spa tub is one of the most important steps. You must follow strict safety rules to protect yourself and your home. Most spa tubs need a dedicated electrical circuit. This means the circuit only powers the spa tub and nothing else. The voltage is usually 120V for small tubs and 240V for larger ones. The amperage can range from 15 to 60 amps, depending on the size and features.
Here are the main electrical code requirements you need to follow:
- Install a dedicated electrical circuit that matches the spa tub’s voltage and amperage.
- Use wiring and conduit rated for outdoor and wet conditions, such as THWN or THWN-2.
- Place a disconnect switch near the spa tub. It must be easy to reach but not possible to touch from inside the tub.
- Add Ground Fault Circuit Interrupter (GFCI) protection at the electrical panel and in the spa tub’s system.
- Check local permits and make sure you follow all electrical codes before you start.
- Hire a licensed electrician who knows how to install spa tubs.
- Test and inspect all electrical parts before you fill the tub with water.
Tip: Never try to wire a spa tub yourself unless you are a licensed electrician. Electricity and water are a dangerous mix.
You also need to pay attention to where you put outlets, switches, and lights. Keep outlets at least 6 feet away from the spa tub. If they are within 10 feet, they must have GFCI protection. Lights or ceiling fans must be at least 12 feet above the spa, or 7.5 feet if they have GFCI protection. Wall switches should be at least 5 feet from the water. Maintenance disconnect switches must be in sight but no closer than 5 feet from the tub. All motors and heaters need GFCI protection, no matter how far they are from the spa. Underground wiring cannot go under the spa and must stay at least 5 feet away unless it is in a special raceway.
Here is a table to help you remember the main electrical requirements:
| Electrical Aspect | Requirement/Specification |
|---|---|
| Voltage | 120V (portable tubs); 240V (larger/built-in tubs) |
| Amperage | 15-20A (120V); 30-60A+ (240V) |
| Circuit | Dedicated circuit only for the spa tub |
| Wiring Type | THWN or THWN-2, rated for outdoor/wet use |
| GFCI Protection | Required at panel and in tub |
| Disconnect Switch | Near tub, accessible, not reachable from inside |
| Permits/Inspections | Must comply with local codes and be inspected |
You must also follow the National Electrical Code (NEC) Article 680. This code says you need GFCI protection for all spa circuits. The disconnect switch must be visible and between 5 and 15 feet from the spa. Bury conduit at least 18 inches deep. Bond all metal surfaces within 5 feet of the spa. Only use insulated copper wires. Do not put outlets or lights directly above the spa. Always get permits and inspections to make sure your setup is safe.
Plumbing Connections
Proper plumbing keeps your spa tub running smoothly and safely. You need to connect the tub to a cold water line with enough pressure, usually between 40 and 60 psi. Use copper or PEX pipes with a minimum diameter of 3/4 inch. This size helps the tub fill quickly and keeps water flowing well.
Follow these steps for safe plumbing:
- Follow all local building codes and rules.
- Use high-quality, non-corrosive pipes like PVC, CPVC, copper, or PEX.
- Match pipe size to the spa tub inlet, usually at least 3/4 inch.
- Install shut-off valves near the spa for easy maintenance.
- Add backflow prevention devices to keep dirty water from getting into your home’s clean water.
- Vent the plumbing system to stop pressure buildup and help drainage.
- Slope drainage pipes at least 1/4 inch per foot and use traps to prevent odors.
- Use the right fittings and solvent cement for watertight connections.
- Insulate pipes in cold areas to stop freezing.
- Get permits and schedule inspections to meet safety standards.
Note: Never connect your spa tub to a hot water line. This can damage the tub’s parts.
You should also install a shut-off valve close to the spa tub. This makes it easy to turn off the water for repairs or winterizing. Always check for leaks after you connect the pipes. Flush the supply lines before hooking them up to remove any dirt or debris.
Drainage
Good drainage protects your yard and home from water damage. You need to plan how you will empty the spa tub and where the water will go. Always turn off the spa tub before draining. Use a submersible pump or the built-in spigot to remove the water.
Follow these best practices for drainage:
- Direct the drainage hose to a sanitary sewer drain. Never drain water into storm drains or your yard unless you have permission.
- Clean the tub with non-abrasive cleaners after draining.
- Dry the tub completely to stop mildew and water spots.
- Check and maintain the spa cover to prevent water damage from sagging or mold.
- Refill the tub and balance the water chemistry after each drain.
- Monitor water quality and follow local rules for chemical disposal.
Alert: Never drain spa water into a septic system. This can cause the system to fail.
You should test the water before draining. Make sure chlorine and bromine levels are below 0.1 mg/L and the pH is between 6.5 and 8.5. Remove any debris or pollutants. Saltwater spa water must not go into storm drains or sewers. You may need to haul it to a waste facility. Always control drainage to prevent flooding or erosion. Some cities require you to submit a form before draining your spa tub. Dispose of filter materials and wash water properly. Do not let these go into storm drains or sewers.
Delivery and Placement
Access Planning
You must plan how the spa tub will get to your home. Look at all the ways to bring it in, like gates, doors, and paths. Measure these spots to see if the tub can fit. Move things out of the way, such as tools, chairs, or tree branches. If there are stairs or bumpy ground, you might need special tools.
Here is a table that shows some delivery problems and how experts fix them:
| Delivery Challenge | Description | Expert Solution |
|---|---|---|
| Limited Access Points | Narrow doors, pathways, gates restrict entry | Professional assessment and partial disassembly to fit through tight spaces |
| Uneven Terrain | Uneven ground affects installation and stability | Use of specialized equipment like dollies, cranes, and leveling tools |
| Avoiding Damage | Risk of damage to delicate parts during transport | Protective padding and secure strapping to safeguard components |
| Space Constraints | Tight corners and narrow pathways | Skilled maneuvering by experienced professionals to prevent damage |
| Weight and Size | Heavy and bulky tubs require careful handling | Proper planning to evenly distribute weight during delivery |
| Time Constraints | Limited time for delivery and setup | Efficient execution by professional teams to minimize delivery time |
Tip: Pick the best way to move your tub based on its size and weight. Use flatbed trucks or liftgate trucks for big tubs.
Moving the Tub
Moving a spa tub needs careful steps. First, turn off the power at the main breaker. Unplug all wires from the tub. Drain all the water and close the plumbing lines. Clean the tub and take off loose parts like covers or filters. Put down plywood if the ground is soft or not flat.
Follow these steps to move the tub safely: 1. Use a strong spa dolly with wheels that lock. 2. Tie the tub down with straps and ratchet tie-downs. 3. Cover the outside with blankets or foam pads. 4. Wear gloves and boots with steel toes. 5. Lift using your legs, not your back. 6. Move slowly and talk with your helpers. 7. Make sure the path is clear before you start. 8. Call professional movers if you are not sure what to do.
Note: Always check the tub for damage after moving it. Tell someone right away if you find any problems.
Professional Help
It is smart to hire pros for delivery and placement. Experts know how to move big, heavy tubs safely. They use special tools and have insurance if something goes wrong. If you have tight spaces, stairs, or need a crane, pros can handle it.
Professional installers also check the base, make sure the tub is level, and help with electrical hookups. They make sure your tub is safe and works right. For deck or built-in tubs, call a certified contractor early. Licensed electricians must do all the electrical work to keep you safe.
Hiring pros helps you feel calm and stops expensive mistakes.
Startup
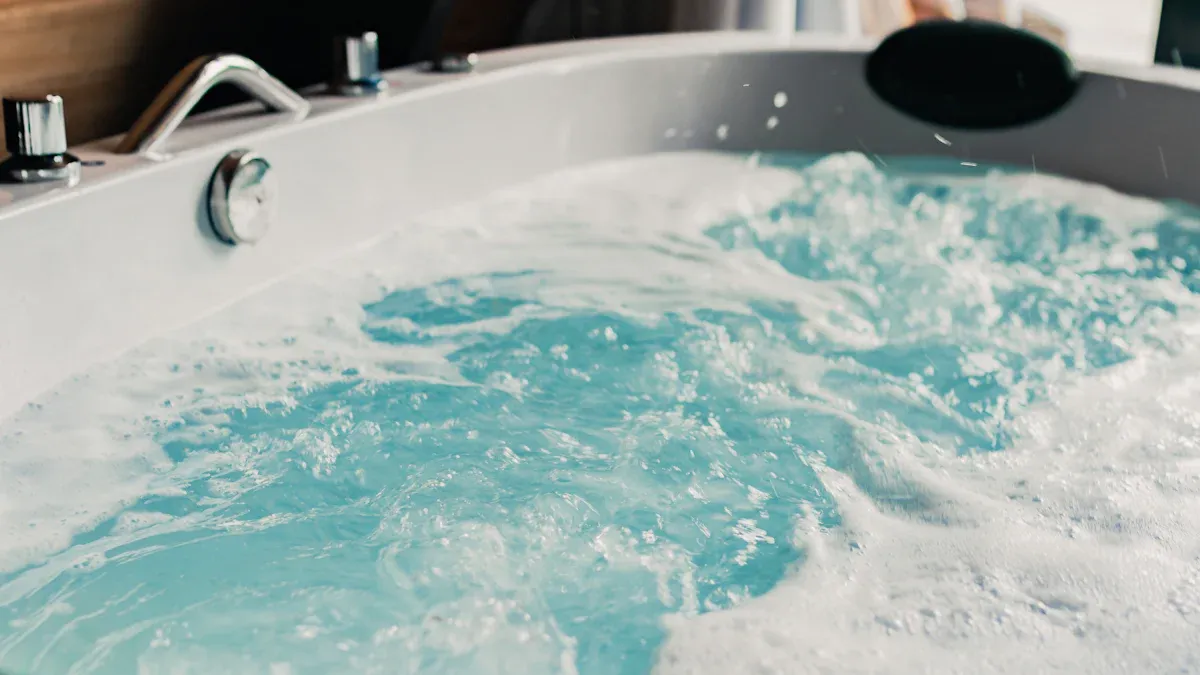
Filling and Leak Check
Fill your spa tub with clean water before using it. Always turn off the power first for safety. Use a garden hose to fill the tub. Fill it above the jets but below the skimmer. Mark the water level with a crayon or marker. Open the equipment area and look for leaks or wet spots. If you see wet foam, take it out to check for hidden leaks. Look at jets, pumps, heater plumbing unions, sensors, and valves for water or rust. Tighten unions by hand and change gaskets or O-rings if needed. You can use leak sealant for small leaks, but it will not fix pump seal leaks.
To check for leaks, do these steps: Fill the tub and mark the water level. Run the system for 24 hours. Mark the new water level and see if any water is gone. Fill the tub again to the new mark and turn off the system for another 24 hours. Compare water loss with the system on and off. If water loss is the same both times, the shell may leak. If more water is lost when running, it may be a pressure leak. If less water is lost when running, it may be a suction leak.
Always turn off all power before checking for leaks to stay safe.
Powering Up
Get your spa tub ready before turning on the power. Read the owner’s manual to learn about your model. Rinse and drain the tub to remove old water or antifreeze. Clean the inside with a gentle cleaner. Put in the filter cartridge and fill the tub with water over the filter area to stop air locks. Check all drain plugs and fittings to make sure they are tight. Open gate valves so water can move through the pump and heater.
Turn the power back on by plugging in or flipping the breaker. Test all controls, jets, and blowers. If you see air in the pipes, prime the pump. Let the water heat up to your favorite temperature, usually between 90°F and 102°F. Do not go over 104°F. Test the water for pH, total alkalinity, calcium hardness, and sanitizer levels. Add chemicals as needed and run the water for about 30 minutes. Test the water one last time before using the tub.
Tip: Call a licensed electrician if you find loose wires or electrical problems.
Water Treatment
Treat the water to keep it clean and safe. Clean the filters and refill the tub. Heat the water to the temperature you like. Add water treatment and conditioner to balance pH and alkalinity. Test total alkalinity and adjust it to 80-120 ppm. Check pH and keep it between 7.2 and 7.8. Measure water hardness and aim for 175-250 ppm. Use stain and scale control products if you need them.
Sanitize the water with bromine or chlorine. Shock the water every week or more if it looks cloudy or gets used a lot. Keep the filter working and cover the tub to stop dirt from getting in. You can use hydrogen peroxide-based biguanide sanitizers instead. Other choices are saltwater systems, UV purification, ozone generators, and reverse osmosis. Each method has good and bad points:
| Treatment Option | Pros | Cons |
|---|---|---|
| Chlorine | Works well; cheap; easy to use | Strong smell; can irritate skin; health risks; bad for the environment |
| Saltwater Systems | Gentle on skin and eyes; self-adjusts | Still uses chlorine; can damage parts; costs more at first |
| UV Purification | Uses fewer chemicals; kills germs | Does not last; needs backup sanitizer; costs more |
| Ozone Generators | Uses less chlorine; makes water clear | Needs backup sanitizer; must replace every 2-3 years |
| Reverse Osmosis (RO) | Removes solids and chemicals; softens water | Does not kill germs; slow; costs a lot to keep up |
Keep your spa tub covered when you are not using it. This helps keep the water clean and saves chemicals.
Maintenance
Cover Use
You need a strong cover to keep your spa clean. Safety covers help keep kids and pets out. This lowers the chance of accidents. Covers with good insulation keep heat inside. This saves energy and helps your heater last longer. Covers stop leaves, bugs, and dirt from getting in. You will spend less time cleaning your spa. Tough covers protect your spa from sun and rain. This helps your spa last longer.
Good covers use thick insulation and strong vinyl. These materials stop mildew and damage from the sun. Covers made to fit your spa seal tightly. This keeps heat inside. Cheap covers with thin material soak up water. They do not insulate well. Covers shaped with a slope stop water from pooling. Strong latches keep the cover closed, even in wind.
| Cover Type | Description & Materials | Energy Efficiency & Protection Features | Advantages | Disadvantages |
|---|---|---|---|---|
| Soft Foam Covers | High-density foam with vinyl covering | Good insulation if thick; lightweight and easy to handle | Budget-friendly; energy-saving with thick foam | Less durable; wears faster in harsh weather |
| Hard Covers | Reinforced core (ABS/fiberglass), multilayer insulation | Superior thermal efficiency; strong UV and weather resistance | Long-lasting; better insulation; safety features | Heavier; more expensive; may require lifter |
| Solar Covers | Floating solar blankets absorbing sun rays | Supplement heat retention but do not replace standard covers for protection | Eco-friendly; inexpensive heat retention | No debris protection; less durable; no safety features |
Tip: Always put the cover on when you are not using your spa. This keeps water clean and saves money on heating.
Cleaning
Cleaning your spa often keeps it safe and nice. Clean filters every two weeks with special cleaners and water. Change filters every year, or sooner if you use your spa a lot. Scrub the inside and jets to get rid of algae, dirt, and oils. Only use cleaners made for hot tubs. Regular cleaners can hurt the finish.
- Use gentle cleaners and a soft rag or scrubber for the shell.
- Put baking soda on small spots to clean them.
- Clean spa pillows as the Owner’s Manual says.
- Rinse WeatherPro™ covers with a hose, scrub with mild soap, and dry.
- Clean filters every month with a hose and special cleaner. Change them every three years.
- Drain and refill the spa every three to four months. Use a pre-filter on the hose to keep out new dirt.
Every week, wipe surfaces with a soft cloth and pH-neutral cleaner. Put tennis balls in the water to soak up oils.
Troubleshooting
Sometimes your spa may have problems. Heaters can stop working if water pH is too low. Leaky seals happen when o-rings or pump seals wear out. Pumps may make odd sounds if bearings break. Weak jets or leaks can come from bad water chemistry. Poor water flow may mean clogged filters or not enough pump time. Circuit boards can fail if wires are loose or too hot.
Common problems include:
- Leaks from cracks or plumbing issues
- Heater failures from dirty filters or bad thermostats
- Jet problems from closed valves or clogged filters
- Cover damage from weather
- Low water pressure from clogged filters or low water
- Cloudy water from dirty filters or poor cleaning
- Algae growth from high pH and low sanitizer
- Spa not working because of power failure or tripped GFCI
Doing regular maintenance and keeping water balanced stops most problems. If you see leaks or electrical trouble, call a professional.
If you follow each step, you can install your spa tub safely. Always ask experts for help with electrical or plumbing work. They also know about building codes. Taking care of your spa often helps it last longer and work well. Here are some extra tips to help you:
- Have a professional check your spa once a year.
- Clean the filters every month and test the water each week.
- Look at your owner’s manual if something is wrong.
- Call local repair experts if you need help.
- Use online help pages for advice and answers.
Keep your spa covered and check it often to enjoy it more.