Voor de vroege planning kunt u de afmetingen van de saunabank beter baseren op het afgewerkte plafond, de beoogde zithouding en de bruikbare banklengte dan op één universeel getal van vloer tot zitting. Harvia adviseert momenteel ongeveer 1100–1200 mm (43–47 in) van de bovenste bank tot het plafond, ongeveer 500 mm (20 in) diepte van de bovenste bank voor zitten, 600 mm (24 in) of meer voor liggen of zitten met de voeten omhoog, ongeveer 600 mm (24 in) bankbreedte per zittende gebruiker, en ongeveer 350 mm (14 in) opstaphoogte.
Deze waarden zijn planningsreferenties van de fabrikant, geen universele saunanormen. De uiteindelijke bankgeometrie moet nog steeds passen bij de werkelijke ruimte, de verhouding tussen bovenste en onderste niveau, de veiligheidsafstanden van kachel en beschermrooster, de deurdoorgang, toegang, beoogde gebruikers en eventuele projectspecifieke toegankelijkheidseisen. Wanneer een gekozen kachel of banksysteem modelspecifieke eisen stelt, gaan die vóór op algemene planningscijfers.
Als u nog steeds daadwerkelijke saunavormen en -modellen vergelijkt in plaats van een definitieve bankindeling te beoordelen, begin dan met het HACHILL saunassortiment.
Welke afmetingen van saunabanken moeten daadwerkelijk worden gecontroleerd?
Een saunabank kan niet op basis van alleen de hoogte worden beoordeeld. De tekening moet op zijn minst duidelijk maken: de bankhoogte, bruikbare diepte, ononderbroken bruikbare lengte, verhouding bovenste/onderste niveau, afgewerkt plafond, treden of voetplatform, kachel- en beschermingszone, deurroute en circulatieruimte.
Het onderscheid tussen nominale en bruikbare afmetingen is belangrijk. Een lange wand creëert niet noodzakelijk dezelfde lengte aan bruikbare zitplaats: de kachel, bescherming, deur, hoekovergang of toegangsroute kan een deel ervan wegnemen. Een diepe bovenbank kan ook aan waarde verliezen als het afgewerkte plafond te weinig hoofdruimte overlaat.
Veeg of scroll horizontaal op kleinere schermen om de volledige tabel te bekijken.
| Tekeninginvoer | Wat het daadwerkelijk aangeeft |
|---|---|
| Afgewerkte plafondhoogte | Beschikbare verticale ruimte boven de bezette bank |
| Hoogte van de bovenbank | Waar de gebruiker zit binnen de verticale thermische omgeving van de ruimte |
| Onderbank / opstap | Toegang tot het bovenste niveau en positie van het onderlichaam |
| Bruikbare bankdiepte | Of het oppervlak de beoogde zit- of ligpositie ondersteunt |
| Ononderbroken bruikbare lengte | Werkelijk bezette zit- of ligruimte |
| Kachel- en beschermingszone | Welk ogenschijnlijk bankgedeelte kan niet als bruikbaar worden gerekend |
| Deur en circulatieroute | Of de toegang conflicteert met bezette posities |
| Uitstekend rugleuning- / voetensteungedeelte | Of accessoires de bruikbare bankruimte verminderen |
Huidige banksystemen van fabrikanten gebruiken zelf verschillende dieptes en configureerbare lengtes. Zo biedt het Formula-banksysteem van Harvia momenteel Opties voor zitdiepte van 400, 500 en 600 mm met aanpasbare zitlengte. Dat is een nuttig bewijs dat de geometrie van saunabanken niet één vaste industriële dimensie is. Zie de productgegevens van Harvia's Formula-bank.
Definieer in de praktijk de volledige bezette geometrie voordat u beslist of een bankindeling geschikt is.
Hoe moet de hoogte van een saunabank zich verhouden tot het plafond en de warmtezone?
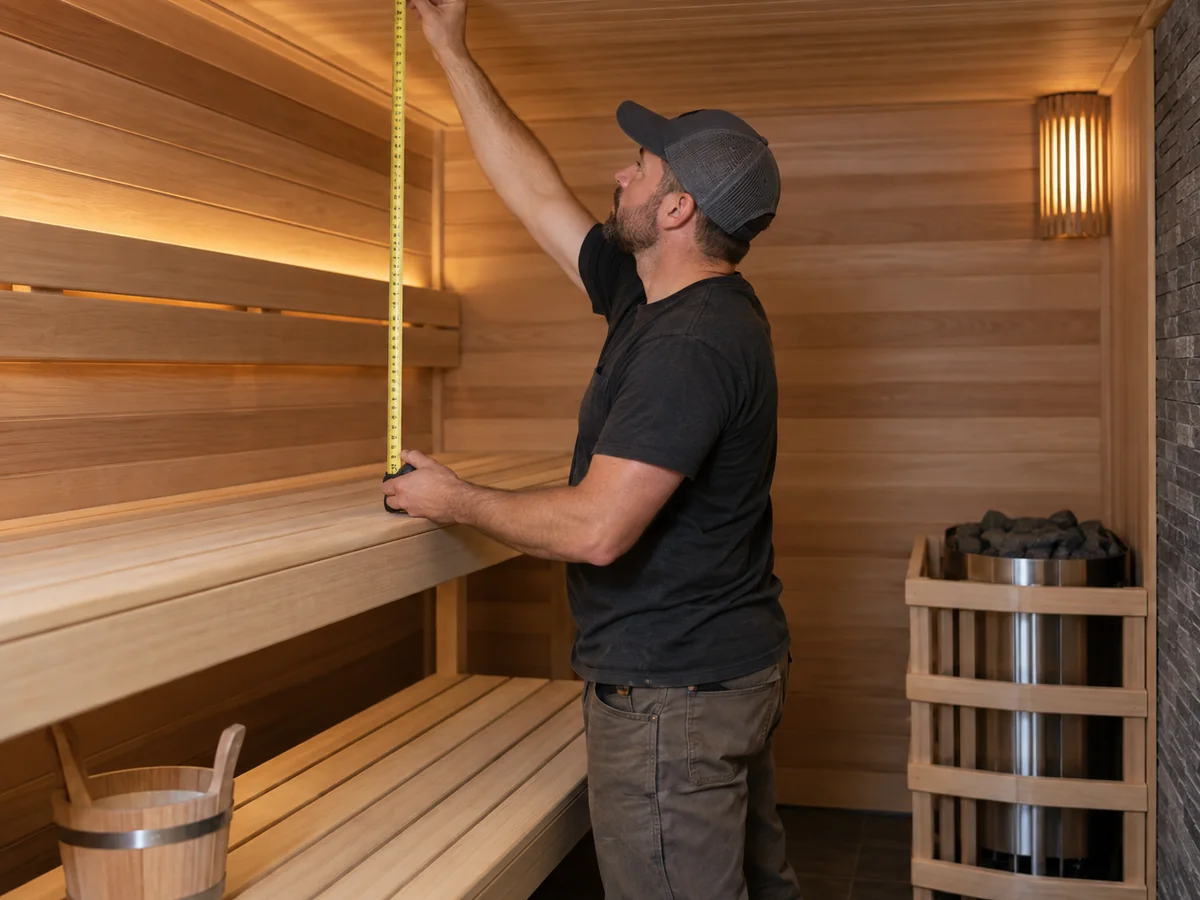
De hoogte van een saunabank moet worden beoordeeld ten opzichte van het afgewerkte plafond en de bezette warmtezone, niet alleen als een meting van vloer tot zitting.
Warmtestratificatie betekent dat de luchtomstandigheden in de kamer verticaal kunnen verschillen. Een Fins saunaonderzoekspaper uit 2026 gemeten temperatuur en relatieve vochtigheid bij twee hoogtes (0.90 m en 1.73 m) en drie horizontale posities en rapporteerden wezenlijk verschillende omstandigheden op de twee gemeten hoogten onder de testomstandigheden. Dat ondersteunt positiebewuste interpretatie in plaats van aan te nemen dat één kamertemperatuur elk bezet niveau vertegenwoordigt. Bekijk de multi-point saunameetstudie uit 2026.
De werkelijke verdeling wordt ook beïnvloed door de ruimte, de kachel en de luchtstroom, dus dit doet betekent niet geen universele regel ontstaan zoals “de bovenste bank is altijd X graden heter.”
Bovenste bank: hoofdruimte en de bezette warmtezone
De bovenste bank moet twee dingen tegelijk oplossen: de gebruiker in een nuttig deel van de verwarmde ruimte plaatsen en praktische hoofdruimte onder het afgewerkte plafond laten. De bank verhogen zonder het plafond te controleren kan de zithouding benauwd maken. Onnodig laag plaatsen kan meer van het heetste ruimtevolume boven de gebruiker laten in plaats van rond de bezette zone.
Harvia’s huidige advies voor bankplanning beveelt ongeveer 1100–1200 mm (43–47 inch) tussen de bovenste bank en het plafond. Behandel dat als een genoemde fabrikant-planningreferentie—geen wereldwijde code of een afmeting die automatisch op elke sauna van toepassing is. Harvia’s advies voor bankplanning.
Dit is de reden waarom een vloer-tot-zit-afmeting moet worden behandeld als een uitvoer van de kamergeometrie in plaats van als het eerste getal dat in de tekening wordt gekopieerd.
Een zittende gebruiker, iemand die met de voeten op dezelfde bank zit en iemand die achteroverleunt bezetten niet dezelfde verticale ruimte. Voor bredere coördinatie van de hele ruimte, inclusief behuizing en ventilatie-interfaces, gebruikt u HACHILL’s Hoe bouw je een sauna gids in plaats van deze pagina om te vormen tot een constructiehandleiding.
Onderbank en opstapniveau: toegang, voeten en verticale positie
Het onderste niveau kan dienen als zitplaats, voetsteun, opstap of een combinatie van die functies. Die functies mogen niet worden samengevoegd tot één universele hoogte voor de onderbank.
De relatie met de bovenbank beïnvloedt het gemak van toegang, de positie van voeten en onderlichaam, de bruikbare beenruimte, de circulatie nabij de kachel en de positie van de gebruiker binnen de verticale thermische omgeving van de ruimte. De tekening moet de niveaus daarom afzonderlijk weergeven in plaats van alleen “tweelaagse banken” te specificeren.”
De huidige bankplanningsrichtlijn van Harvia gebruikt ongeveer 350 mm (14 inch) voor tredehoogte als fabrikant-aanbeveling voor de planning. Behandel dat cijfer als een bronspecifieke referentie, niet als een universele eis voor sauna, trap of toegankelijkheid. Harvia’s advies voor bankplanning.
Hoe diep en lang moet een saunabank zijn voor zitten, liggen en werkelijke capaciteit?
De diepte van de bank moet volgen uit de houding; de lengte van de bank moet worden beoordeeld op bruikbare bezette posities. Geen van beide mag worden goedgekeurd op basis van een universele maat- of persoonsaantalregel.
Zitdiepte versus ligdiepte
Een oppervlak dat hoofdzakelijk wordt gebruikt om rechtop te zitten, heeft niet dezelfde diepte-eis als een oppervlak dat bedoeld is om te zitten met de voeten omhoog of om te liggen.
De huidige planningsrichtlijn van Harvia gebruikt ongeveer 500 mm (20 inch) als referentie voor de diepte van de bovenbank en adviseert 600 mm (24 inch) of meer wanneer het de bedoeling is dat u achterover leunt of zit met de voeten op de bank. Dit zijn nuttige aanbevelingen van de fabrikant, geen universele minimumafmetingen.
- Bepaal de beoogde houding.
- Bepaal de diepte die voor die houding nodig is.
- Controleer wat die diepte doet met de circulatie en de geometrie van de onderste bank.
- Controleer of de definitieve ruimte nog steeds werkt.
Een diepere bank kan meer houdingen ondersteunen, maar neemt ook ruimtebreedte in beslag. Meer diepte is niet automatisch beter.
Bruikbare lengte versus gemarkeerde personencapaciteit
Banklengte zorgt voor een ander probleem: kopers beschouwen het aantal personen van het model vaak als bewijs dat de fysieke zitopstelling comfortabel zal zijn. Dat is niet zo.
Gebruik voor de capaciteit de volledige beslissingsketen: marketed capacity → actual bench run → heater/door exclusions → usable occupied positions → intended posture → realistic fit.
Harvia hanteert momenteel ongeveer Als vuistregel geldt 600 mm (24 inch) per zittende gebruiker in zijn algemene ontwerprichtlijnen. Dat is nuttig voor een eerste screening, maar het mag niet worden omgezet in een universele capaciteitsformule. Zie de algemene sauna-ontwerprichtlijnen van Harvia.
De werkelijke bruikbare capaciteit verandert wanneer de kachel of bescherming een deel van de banklengte inneemt, de deur de bank onderbreekt, gebruikers willen liggen, hoeken de bruikbare houding beperken, of de diepte onvoldoende is voor het beoogde gebruik.
Cataloguscapaciteit ≠ bruikbare bankcapaciteit ≠ comfortabele capaciteit ≠ commerciële doorstroming.
Als de beslissing gaat over doorstroming van de locatie, schoonmaakwissel of operationele capaciteit in plaats van fysieke bankpasvorm, draag die taak dan over aan de HACHILL Commercial Sauna Solution.
Rechte, L-vormige of tegenoverliggende banken: welke indeling benut de ruimte het beste?
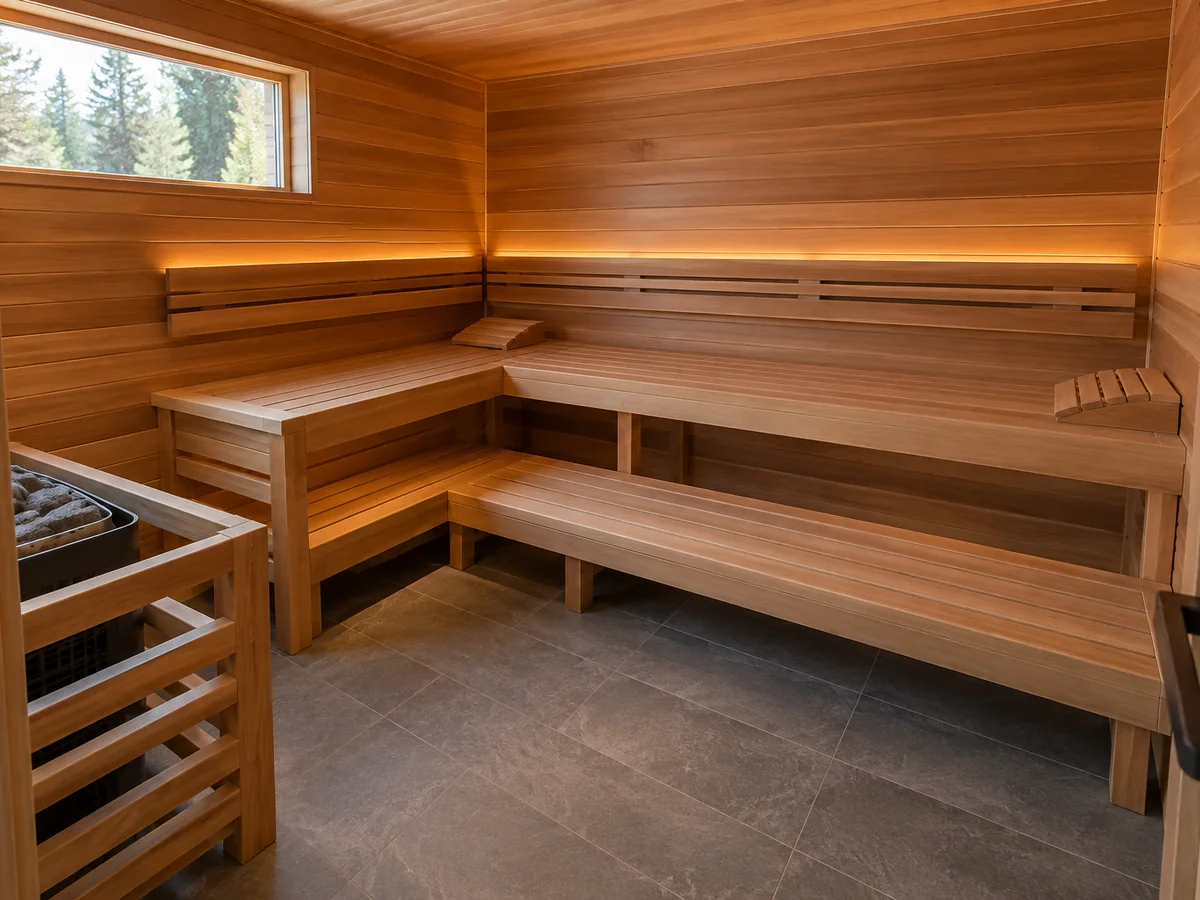
Er is geen universeel beste saunabankindeling. De beste indeling is degene die het meeste nuttige bezette ruimte nadat de kachel, de deur en de circulatieroute zijn meegerekend.
Veeg of scroll op kleinere schermen horizontaal om de volledige vergelijking te bekijken.
| Indeling | Vaak nuttig wanneer | Belangrijkste afweging |
|---|---|---|
| Recht | De ruimte is compact en een ononderbroken banklengte is belangrijk | Minder zithoudingen |
| L-vormig | Een hoek kan een extra zitrichting of een nuttig ligvlak opleveren | Hoekgeometrie kan circulatieruimte innemen |
| Tegenover elkaar geplaatst | De ruimte is breed genoeg voor zitplaatsen tegenover elkaar | Beenruimte, positie van de kachel en centrale circulatie worden veeleisender |
In een kleine ruimte kan een eenvoudige rechte opstelling meer bruikbare zitplaatsen behouden dan een hoek- of U-opstelling in dezelfde footprint te forceren. Een L-vormige bank kan goed werken wanneer de ruimte dit daadwerkelijk ondersteunt, maar mag niet worden gekozen alleen omdat het er op een tekening hoogwaardiger uitziet.
Tegenover elkaar geplaatste banken vereisen voldoende ruimte voor de benen van gebruikers, circulatie en de opstelling van de kachel. De bankrichtlijnen van Harvia vermelden eveneens dat de plaatsing van de kachel een deel van de centrale ruimte tussen tegenover elkaar geplaatste banken kan innemen.
De nuttige vergelijking is hoeveel ononderbroken, bruikbare bankgeometrie overblijft nadat apparatuur en toegang zijn getekend.
Welke veiligheids- en toegankelijkheidsbeperkingen kunnen een comfortabele bankopstelling overrulen?
Een comfortabele bank is niet automatisch een acceptabele bank. Drie verschillende goedkeuringslagen kunnen dezelfde tekening beïnvloeden: comfort en ergonomie, veiligheid van kachel en hete oppervlakken, en toegankelijkheid of andere projectvereisten waar van toepassing.
Vrijheden voor kachel en bescherming
De veiligheidsenvelop van de gekozen kachel heeft voorrang op extra zitplaatsen. De actuele technische richtlijnen van Harvia stellen dat kachels modelspecifieke veiligheidsafstanden hebben die bepalen hoe dicht ze bij brandbare wanden en banken mogen staan, en dat die waarden afkomstig zijn van het typeplaatje, de instructies of de productinformatie van de exacte kachel. Richtlijnen voor veiligheidsafstanden van Harvia-kachels.
Als het verwarmingsmodel wijzigt nadat de banktekening is opgesteld, heropen dan de beoordeling van de vrije ruimte. Voor vragen over de apparatuurselectie gebruikt u HACHILL's Koopgids saunakachel.
Toegang, opstap en valrisico
De route naar de bank is net zo belangrijk als de bank zelf. Een indeling moet worden gecontroleerd op de vraag of gebruikers het beoogde niveau kunnen bereiken zonder onhandig richting de verwarming of de bescherming te worden geleid.
- Kunnen gebruikers het bovenste niveau bereiken zonder conflict met de verwarming?
- Beïnvloedt de deur de route?
- Verdringt extra bankdiepte de circulatieruimte?
- Helpt de onderste laag daadwerkelijk bij de toegang, of oogt deze alleen symmetrisch?
Exacte eisen voor verwarming en bescherming blijven onderdeel van de instructies van de geselecteerde apparatuur.
Toegankelijkheid waar van toepassing
Toegankelijkheid is een projectvereiste die los staat van de gewone woonergonomie. Volgens de Amerikaanse ADA-normen van 2010 Sectie 241 heeft betrekking op sauna's en stoomkamers, en Sectie 612 vereist een toegankelijke draairuimte; waar zitplaatsen aanwezig zijn, ten minste één bank moet voldoen aan Sectie 903 en de deur mag niet in de vereiste vrije vloeroppervlakte van die bank terechtkomen. Pas deze bepalingen alleen toe als de Amerikaanse ADA-scope relevant is voor het project. Raadpleeg de U.S. 2010 ADA Standards.
Richtlijnen voor residentieel comfort ≠ naleving van ADA voor toegankelijke banken.
Neem een afmeting voor een toegankelijke bank niet over uit een Amerikaanse gereguleerde context en publiceer deze niet als de normale hoogte of diepte voor elke residentiële sauna.
Welke bankdetails maken reiniging, droging en onderhoud eenvoudiger?
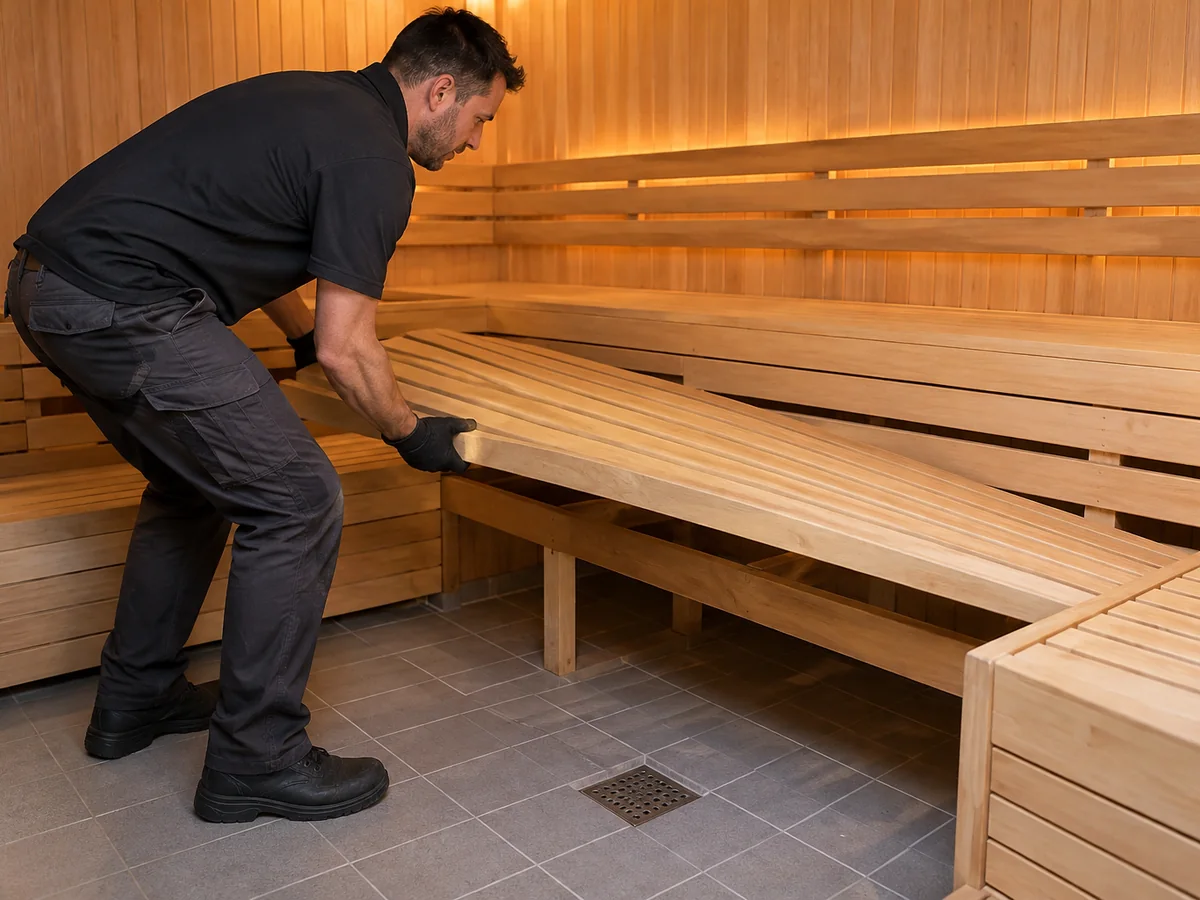
De bankindeling bepaalt ook of de ruimte na installatie kan worden gereinigd, gedroogd en geïnspecteerd.
De actuele onderhoudsrichtlijnen voor sauna's van Harvia benadrukken eveneens dat houten saunaonderdelen na gebruik voldoende tijd moeten krijgen om te drogen. Onderhoudsrichtlijnen voor sauna's van Harvia.
- Is de vloer onder de bank bereikbaar?
- Kunnen houten oppervlakken na gebruik drogen?
- Als het gekozen banksysteem verwijderbare delen bevat, kunnen deze dan daadwerkelijk worden verwijderd zonder andere componenten te demonteren?
- Blijven de kachel en nabijgelegen servicegebieden toegankelijk?
- Vormen rugleuningen, voetsteunen of lagere niveaus verborgen zones die moeilijk te inspecteren zijn?
Sommige actuele banksystemen gebruiken bewust verwijderbare bankdelen om de reinigingstoegang te verbeteren. Het Solar-systeem van Harvia is daar een voorbeeld van. Zie het Solar-banksysteem van Harvia.
Dat wel betekent niet betekent dat elke saunabank afneembaar moet zijn. Het betekent dat reinigbaarheid in de geometrie thuishoort controleren voordat de lay-out wordt goedgekeurd. Er is hier ook geen basis voor het bedenken van één universele board-gap-waarde garandeert zogenaamd een betere droging of hygiëne.
Wat moet u op de tekening bevestigen voordat u de indeling van een saunabank goedkeurt?
Keur een saunabank niet goed op basis van een weergave, een personentellingslabel of een geïsoleerde dimensie. De gecontroleerde tekening moet de volledige bezette geometrie controleerbaar maken.
Op kleinere schermen veegt of scrolt u horizontaal om de volledige beslissingstabel te bekijken.
| Tekenveld | PASS-vraag | HOLD-trigger |
|---|---|---|
| Afgewerkt plafond | Is de bruikbare hoofdruimte vrij? | Plafondrelatie ontbreekt of is voorlopig |
| Bovenste bank | Zijn hoogte en bruikbare diepte gedimensioneerd? | Er wordt alleen een generiek banksymbool weergegeven |
| Onderbank / opstap | Is de toegangsrelatie duidelijk? | Toegang op het hoogste niveau blijft ongedefinieerd |
| Bankje rennen | Is ononderbroken bruikbare lengte zichtbaar? | Capaciteit wordt alleen gerechtvaardigd door het aantal personen |
| Verwarming / bewaker | Is het geselecteerde verwarmings- en veiligheidsenvelop opgelost? | Verwarming is nader vast te stellen of de speling kan niet worden gecontroleerd |
| Deur | Blijft het deurpad vrij van bezette/toegangsruimte? | Schommelconflicten met zitplaatsen of circulatie |
| Rugleuning / voetensteun | Is hun projectie inbegrepen? | Accessoires verminderen de ruimte, maar zijn in de tekening weggelaten |
| Toegankelijkheid | Zijn de toepasselijke vereisten opgelost? | Het toepasselijk toepassingsgebied is weggenomen |
| Reiniging / service | Zijn de relevante vloer- en apparatuurruimten bereikbaar? | Grote gebieden worden na installatie ontoegankelijk |
PROCEED en HOLD in deze handleiding zijn kopers-/projectverificatiebeslissingen, geen wettelijke classificaties. PROCEED betekent dat de bankgeometrie en interfaces klaar zijn voor de volgende projectbeoordeling; het brengt op zichzelf geen structurele, constructieve of regelgevende goedkeuring tot stand.
Voor een geselecteerd HACHILL-model dat product-/locatiecoördinatie nodig heeft, gebruikt u Installatie & technische ondersteuning.